Getting a manicure can make you feel like a million bucks! And also cost you a few dollars too… or not!
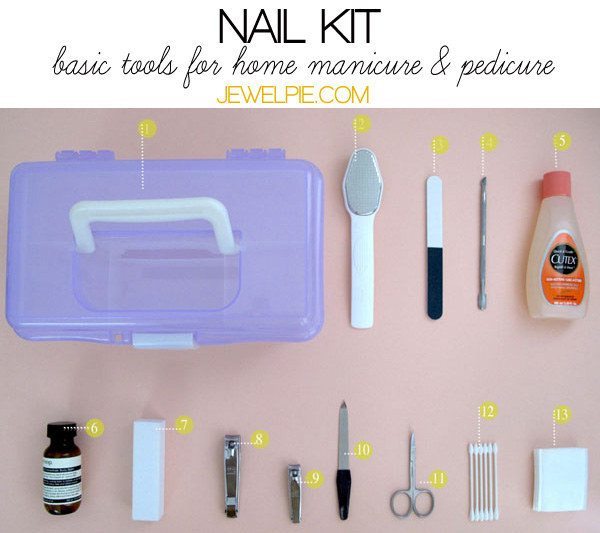
Get the right tools.
Your tool kit should include: A metal foot file, buffer, metal cuticle pusher, nail polish remover, cream, buffing block, metal toenail clipper, metal nail clipper, metal nail file, cuticle scissors, cotton bud (preferably pointed), and cotton pads. For more info, go here.
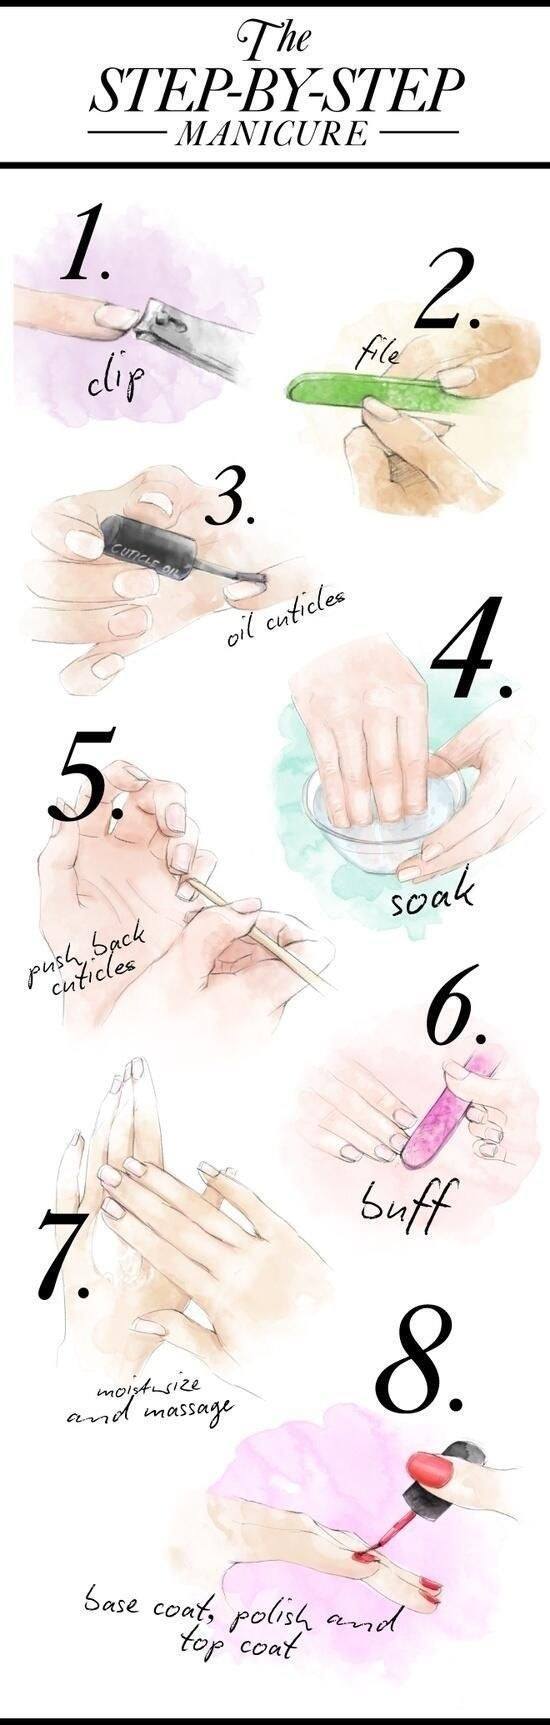
Prep your nails like a pro.
Prepping can make a huge difference when it comes to at-home manicures. Go through all of the steps before you get to the polish.
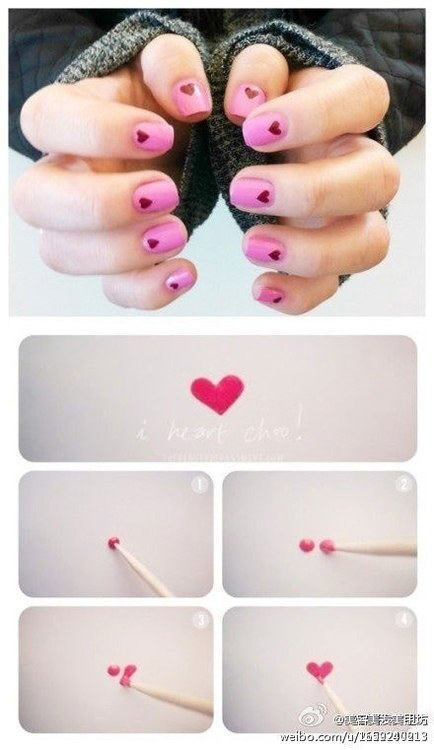
Try a toothpick to make small and sweet nail art…
Or you can DIY a dotting tool.
Just stick a pin into a pencil eraser.

There are actually a ton of dotting options you should know about.
Anything with a point (like the ends of paint brushes, pins, bobby pins, ballpoint pens, floss picks, pencils, and pushpins) can become a dotting tool. Dip the tip in nail polish and press it to a piece of aluminum foil (or anything other nonabsorbent material) to see what kind of dot it creates.

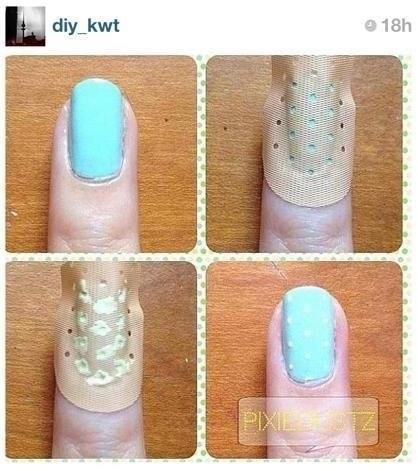
If you’d rather not use a dotting tool, try a Band-Aid.
This works best on a nail polish base that’s already been dry for at least a few hours
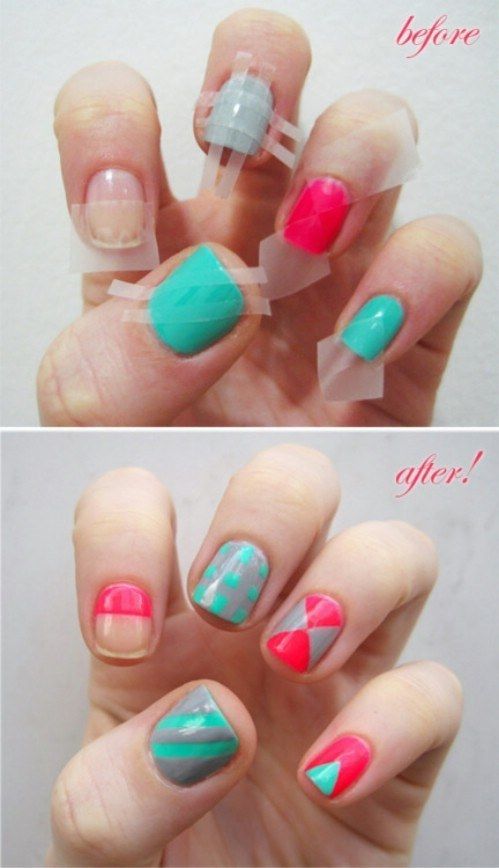
Use tape to create geometric nails.
This works best on nail polish that’s already been dry for one day. If you want to make it even more foolproof, use nail masking tape instead. Get the full tutorialhere.
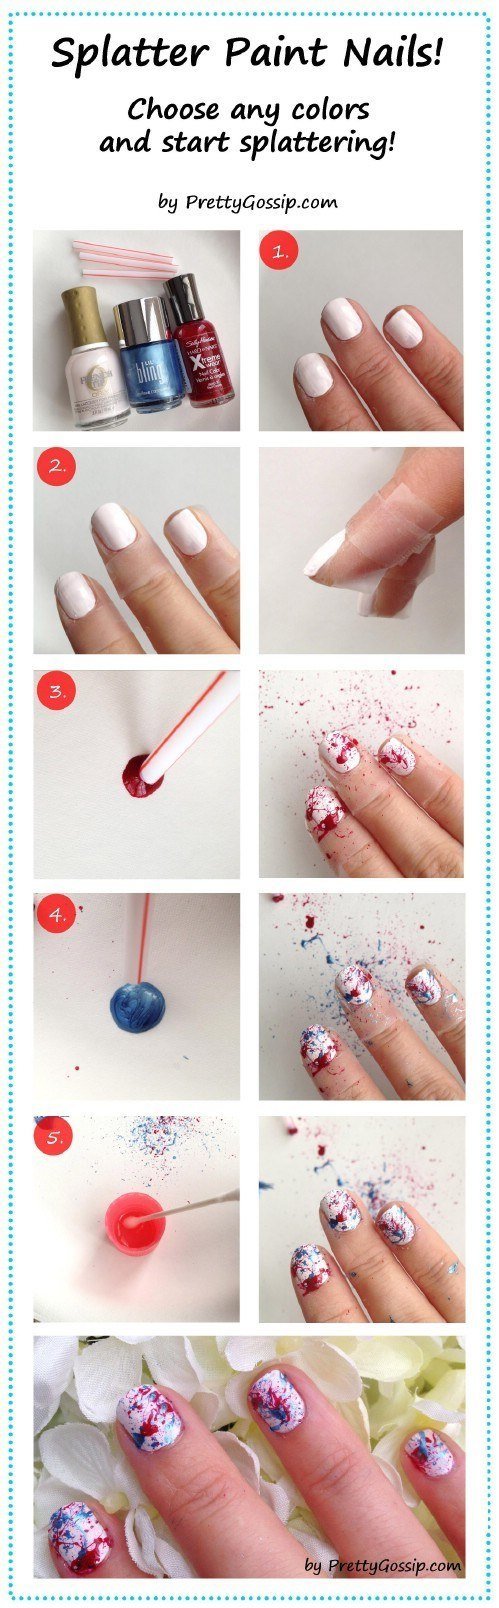
Blow through a straw to create splatter paint nails…
Cut the straw in half (shorter means more control), dip the bottom in nail polish, and blow it (do not by any means inhale it!) onto your nails. Keep the rest of your fingers clean by covering them with tape before splattering. Get more info here.
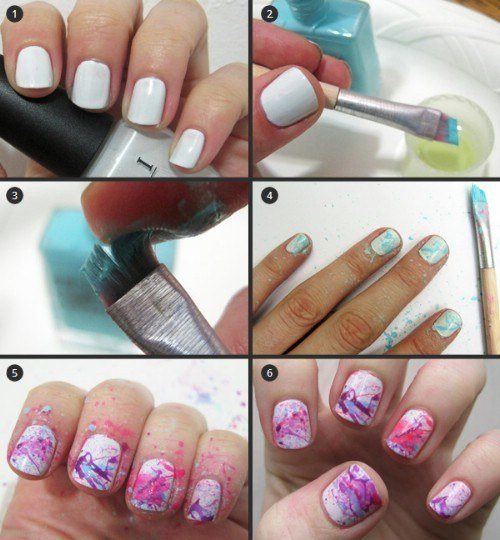
Or use an old makeup brush.
Use a slanted makeup brush to splatter a color (or combination of colors) on your nails. Clean up the edges with nail polish remover.
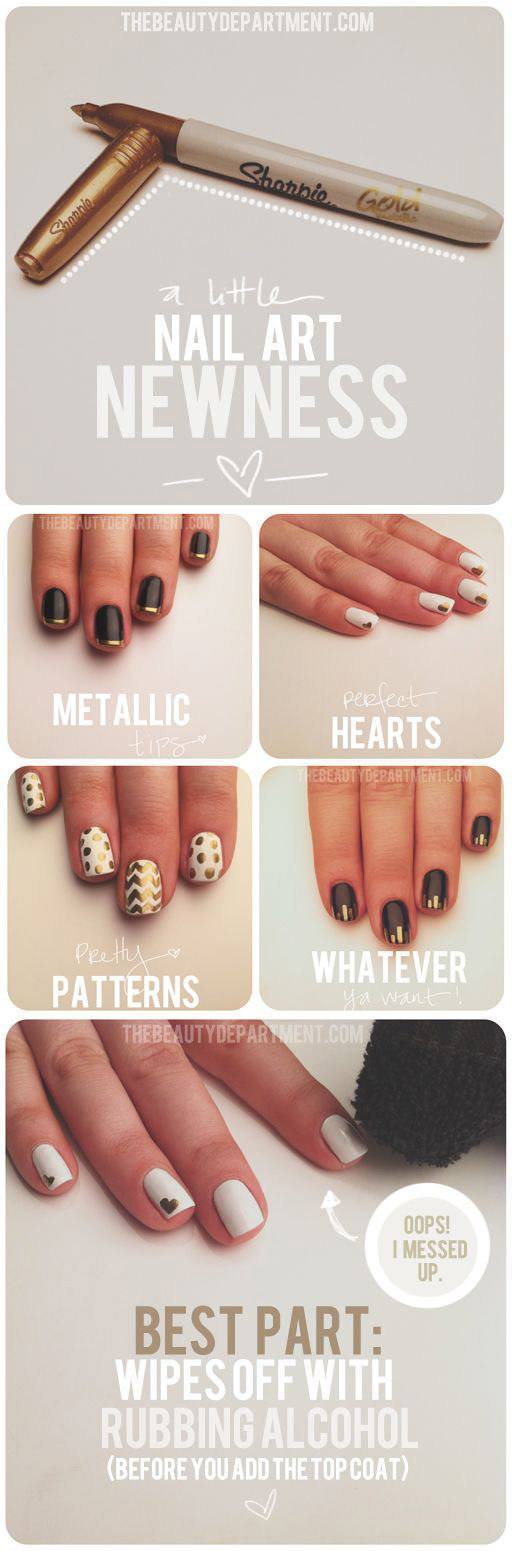
Draw designs with a metallic permanent marker.
You’ll have more control over the design and, if you make a mistake, a little rubbing alcohol can give you a clean slate. But be sure to only use permanent marker on nails that already have polish on them (not directly on bare nails!).
Create an ombre look with a sponge.
Pour a dime-sized amount of two colors onto a piece of plastic wrap. Use a toothpick to blend the two colors together in the middle. Dip a sponge onto the polish and place on the nail, wiggling back and forth a little. Let dry.

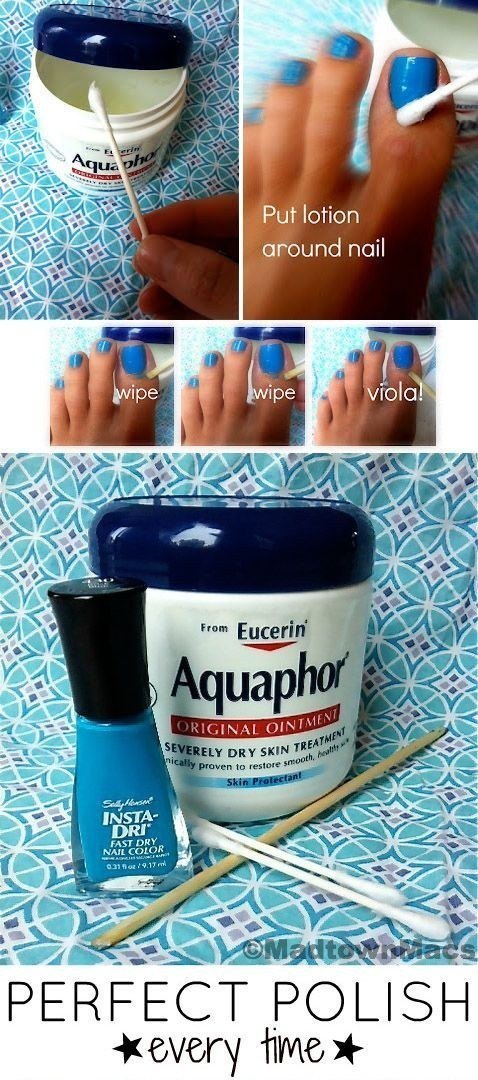
Apply a petroleum-based ointment around the nails BEFORE you start painting for easy clean-up.
But be very careful to not get any ointment on the nail before painting or else it will prevent the polish from sticking.
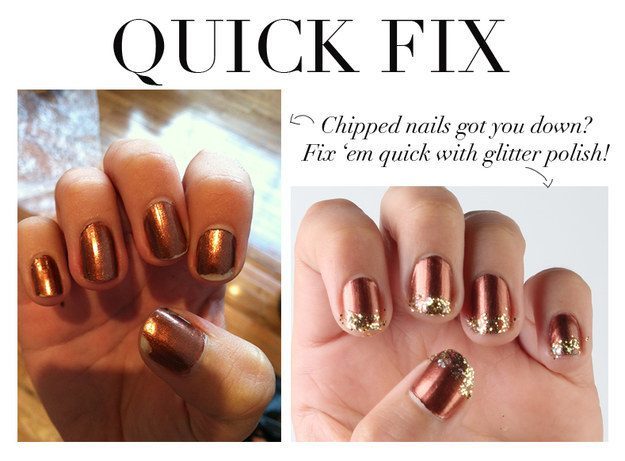
Use glitter polish to disguise chipped nails.
If they chip along the tips, apply glitter a la French mani. If the chipping is everywhere, just apply a glitter coat over the entire nail.
Get the right shape before you paint.
If you have short nails, round and flat shapes are the way to go. If you have longer nails, try oval. If you’re Kylie Jenner, go stiletto.

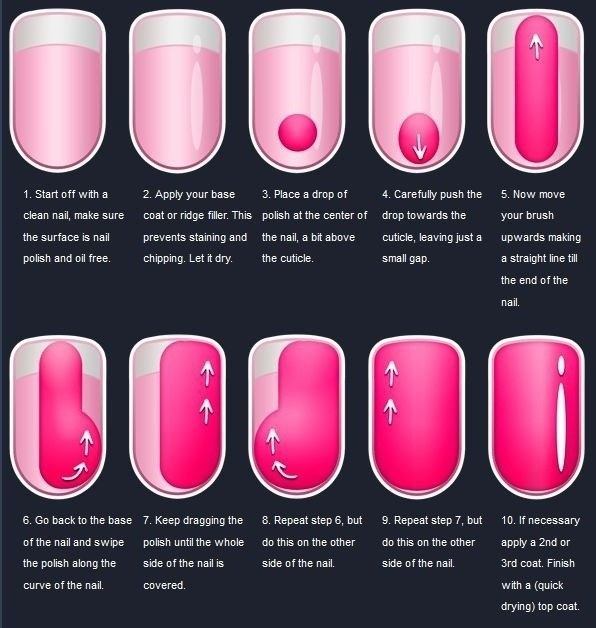
Apply nail polish strategically.
We never seem to do it like the professionals. Why? Because technique is everything.
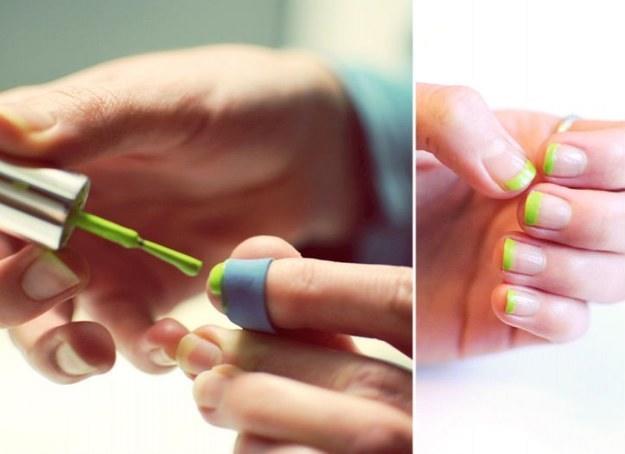
Use Band-Aids (the sheer kind) to get perfect French tips…
Peel off towards the cuticle, not towards the nail. Fo more info, go here.

Or try a thick rubber band…
Pull a small, thick rubber band tight around your finger, exposing only the tip of your nail. Use the line that the rubber band creates as a stencil for your perfect French.
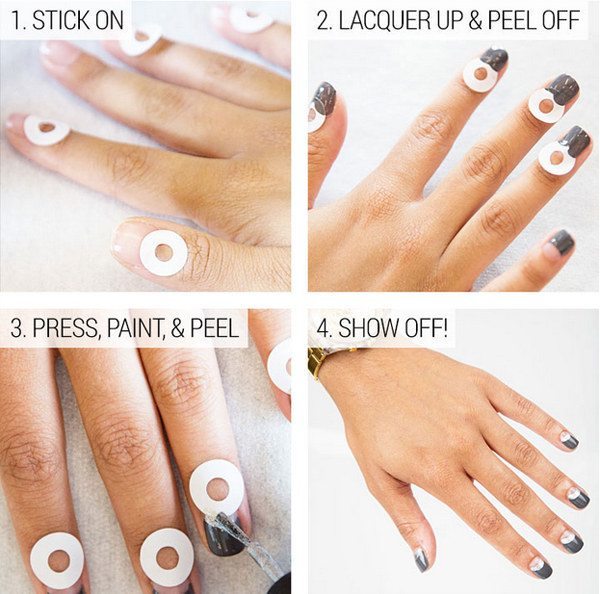
Or go for hole reinforcement labels for the French look.
No steady hand needed.
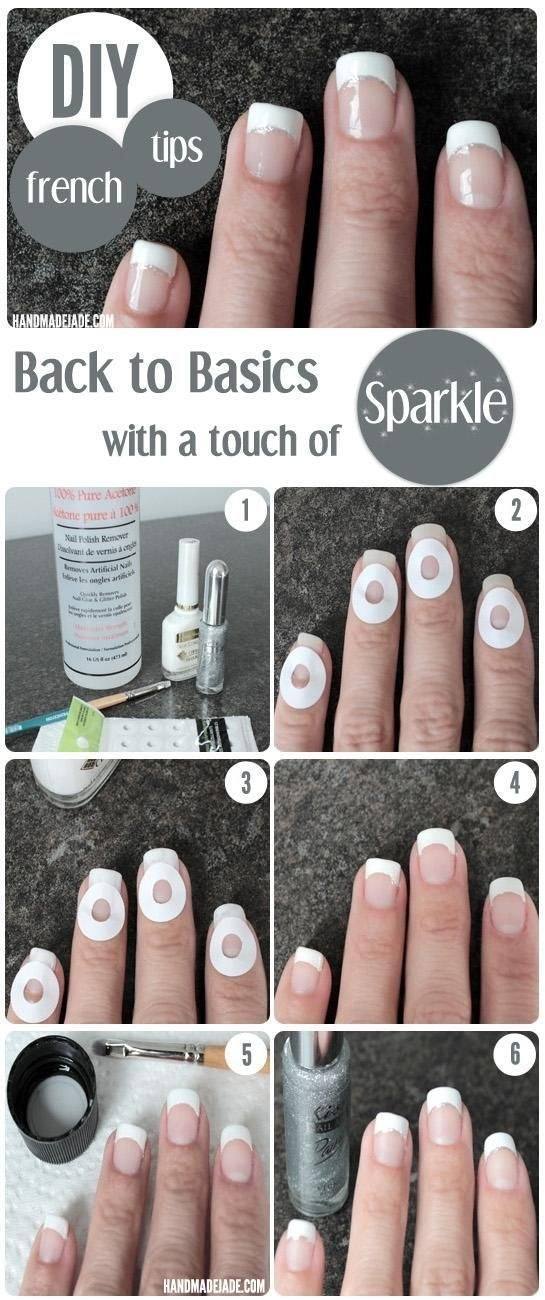
You can also use hole reinforcement labels to get a half moon manicure.
Place the reinforcement at nail bases before painting nails. Then, peel off.