We probably love Hawaiian Rolls more than the next person, or two. And, when we found this recipe, we just had to share. Ashley over at KitchenMeetsGirl.com has one of the coolest sites out there if you love trying new things. This recipe is just what a good Sunday lunch with the family needs. Below is her recipe, along with her very fun to read commentary.
Hawaiian Rolls {Copycat}
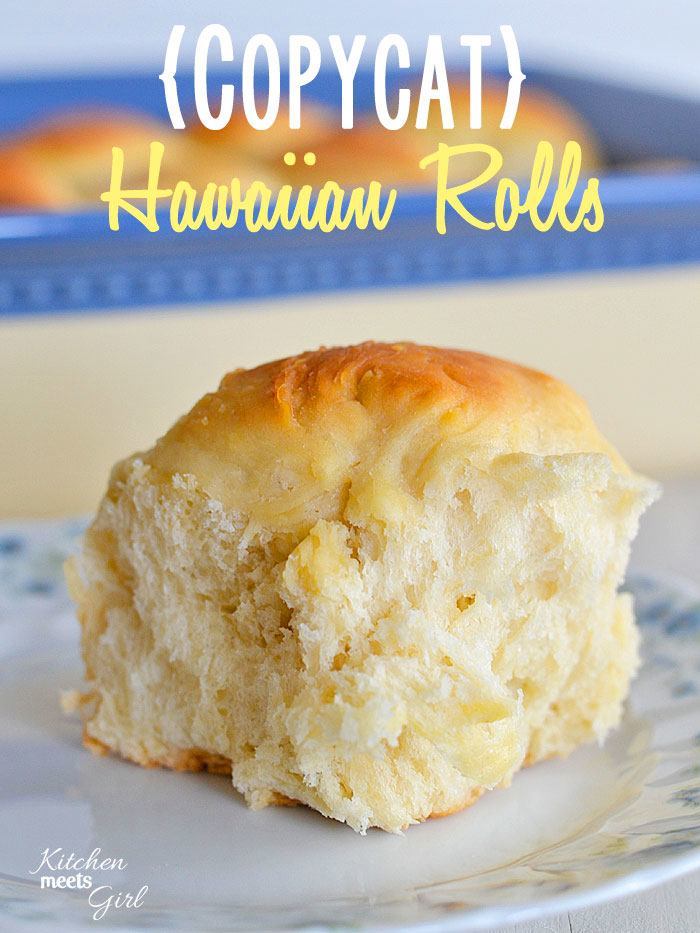 Image Credit: Kitchen Meets Girl
Whenever we’re pressed for time for weeknight dinners {all the time} or on evenings I don’t feel like cooking {um, most nights}, our go-to meal is a deli-chicken, salad bar, and a package of King’s Hawaiian Rolls from our local grocery store. Since there are just three of us in my house, we typically purchase the small four-pack of rolls.
The problem with that? We’re left with one roll and no good way to split it in thirds. Who wants only a measly third of a fluffy Hawaiian roll? No thanks; I want the entire roll. Plus another two or three, for good measure.
#BreadAddictionIsARealThing
So when I found a recipe that proclaimed itself a copycat version of my beloved Hawaiian rolls, I knew I had to try it.
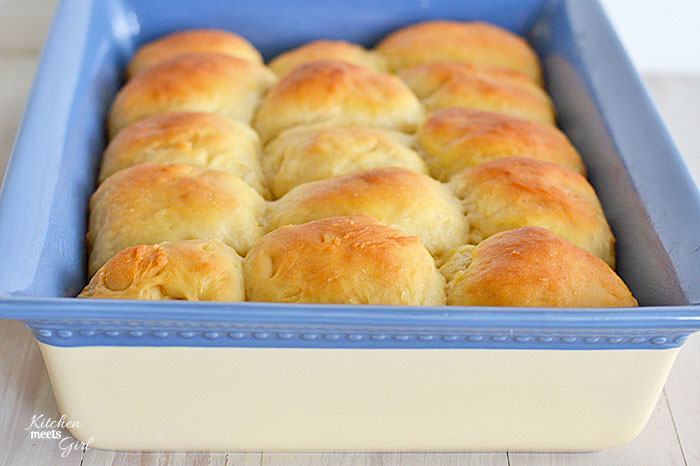 Image Credit: Kitchen Meets Girl
I’m still learning my way around working with yeast, but I found this recipe to be extremely forgiving. You don’t even need to proof the yeast – just sprinkle the yeast in after you’ve combined your wet ingredients and flour. There is some rising time involved with this recipe – about two to three hours total – but trust me when I say: it’s worth it!
This recipe will make three loaves of bread – I know: that’s a lot of bread. It doesn’t get wasted at my house, though. Doodle has been tearing through this stuff like there’s no tomorrow, and I’ve caught the Tall Boy jamming a roll or two into his mouth when he thought no one was looking.
Since I wanted actual rolls, I filled a 9×13 pan first (I got 15 rolls in mine) and still had enough dough left over for a loaf of bread. This was some of the fluffiest, best bread I’ve ever eaten, and so easy, too! The Tall Boy said these rolls tasted just as good as the packaged ones from the store – and I have to say, I agree!
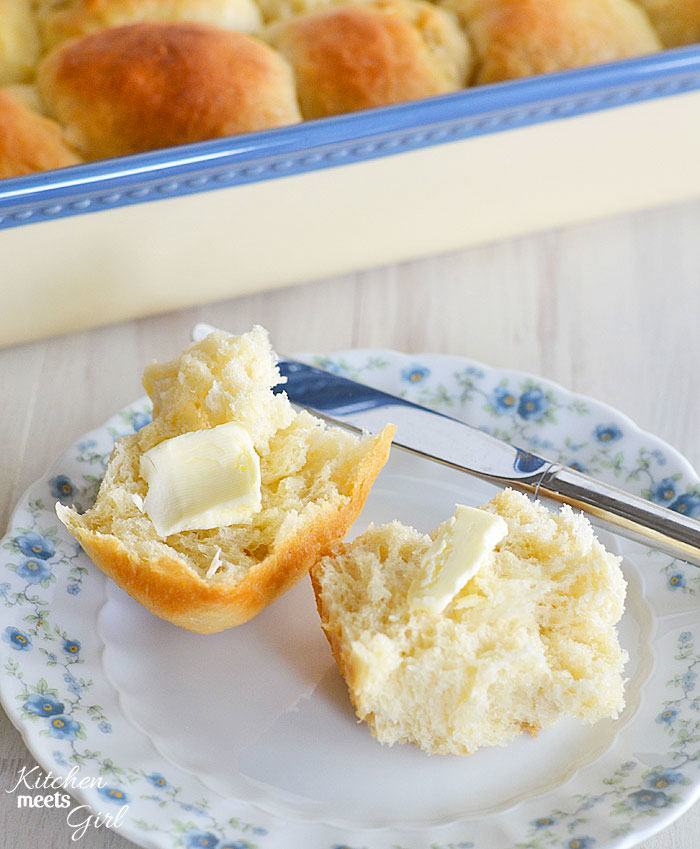 Image Credit: Kitchen Meets Girl
Hawaiian Rolls {Copycat} Ingredients
Makes 3 loaves
- 6 cups all-purpose flour, plus an additional 1/2 cup flour, divided
- 3 eggs
- 2 cups pineapple juice, room temperature
- 3/4 cup sugar
- 1/2 teaspoon ginger
- 1 teaspoon vanilla
- 2 (1/4 ounce) envelopes yeast
- 1/2 cup (8 tablespoons) butter, melted
Hawaiian Rolls {Copycat} Instructions
- In a small bowl, beat your 3 eggs. Add the 2 cups pineapple juice, sugar, ginger, vanilla, and melted butter.
- Measure 3 cups of the flour into a large bowl. Stir in your egg mixture until well-combined. Sprinkle in the yeast packets, one at a time, mixing well.
- Add the remaining 3 cups of flour and mix well. If it becomes to difficult to stir with a wooden spoon, just use your hands! Make sure all of the flour is well incorporated—the dough should be tacky to the touch but not overly sticky. If it appears too wet, sprinkle in a bit of extra flour, just a tablespoon or so at a time. Cover your bowl with a clean kitchen towel and set it in a warm place to rise for 1 hour.
- Remove your dough from the bowl and knead in an additional ½ cup of flour. I kneaded mine 10 to 15 times, making sure the flour was well incorporated.
- Divide the dough into three equal parts. You may either bake 3 loaves of bread, form the dough into rolls, or a combination of the two. I baked one loaf of bread, forming the remaining dough into 15 rolls and baking in a 9×13 pan. Cover and place in warm place to rise for an additional hour, or until the dough doubles in size.
- Bake at 350 degrees for 25 to 30 minutes, or until golden brown. Brush tops with melted butter, and serve warm.
KitchenMeetsGirls says she adapted it from Food.com, but this recipe just seems better… plus, the photos are awesome. :-)